


I generally don't like having open razor blades around me, so be like me and print your own razor blade holder.
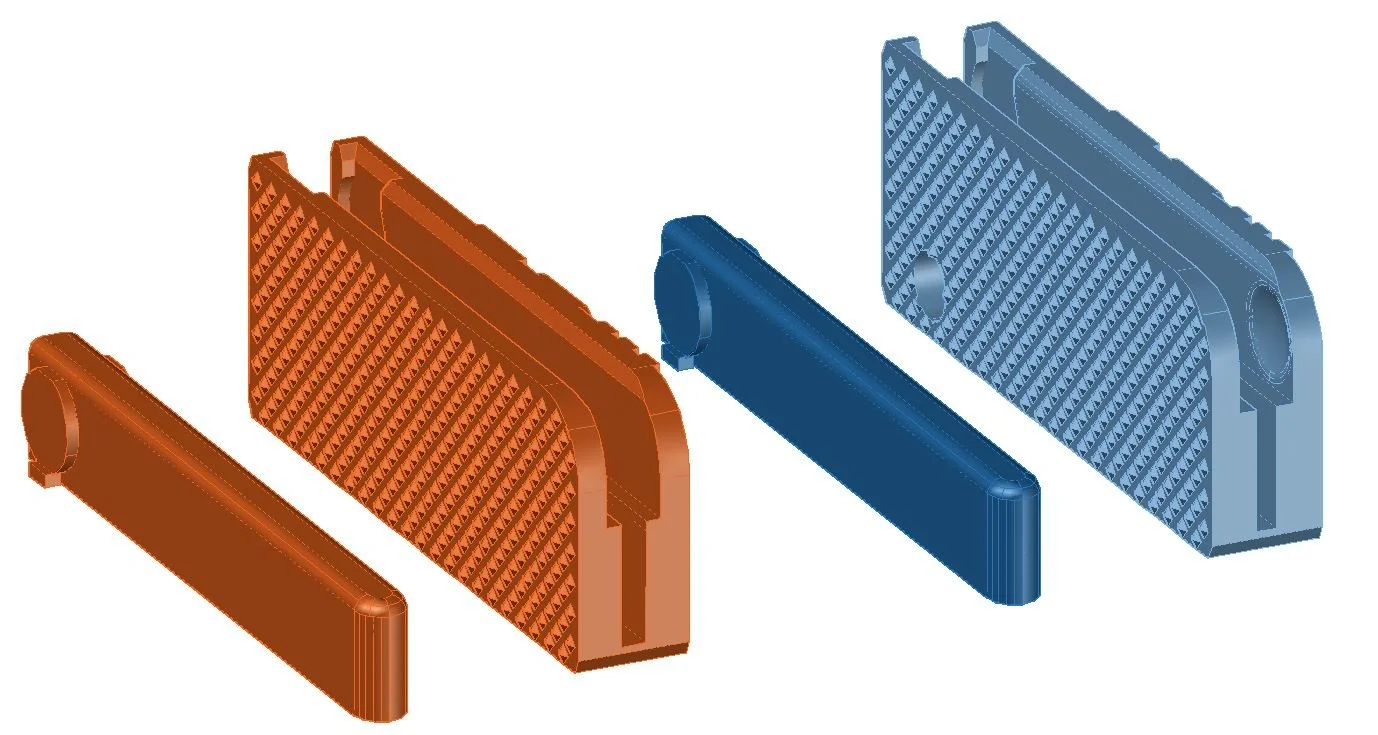
This purchase comes with four files, two are locking versions, the other two do not have the pimple/dimple lock. All four parts are oriented properly. I recommend you print with 3 walls at 10% infill without supports. I also recommend printing at 50% speed on the first 5 layers since the keyed cylinder has two small nubs to support it, and at higher speeds I could see these coming off the bed. I printed mine with a Horizontal Expansion set to -.175 because I know that is how much my printer over extrudes past layer 1. When finished, remove the support nub under the keyed cylinder before inserting the razor blade into the front T shaped cavity. Then, insert the blade holder into the body at a 90 degree angle, so the thin part of the keyed cylinder passes through the keyed cut out opening of the holder.
You WILL need to run a horizontal expansion test first! Use the free horizontal expansion test located in my “Free STLs” section on this website. Set your horizontal expansion to -.175 and run that test. If the circular plate slots into the square body, then use that on this print. If it’s too tight, go lower (-.18) and try again. If the circle falls through without resistance, make that gap smaller (-.17) and try again. You want to be able to drop the circle into the square, without it falling though, but a single finger can push it though.
I generally don't like having open razor blades around me, so be like me and print your own razor blade holder.
This purchase comes with four files, two are locking versions, the other two do not have the pimple/dimple lock. All four parts are oriented properly. I recommend you print with 3 walls at 10% infill without supports. I also recommend printing at 50% speed on the first 5 layers since the keyed cylinder has two small nubs to support it, and at higher speeds I could see these coming off the bed. I printed mine with a Horizontal Expansion set to -.175 because I know that is how much my printer over extrudes past layer 1. When finished, remove the support nub under the keyed cylinder before inserting the razor blade into the front T shaped cavity. Then, insert the blade holder into the body at a 90 degree angle, so the thin part of the keyed cylinder passes through the keyed cut out opening of the holder.
You WILL need to run a horizontal expansion test first! Use the free horizontal expansion test located in my “Free STLs” section on this website. Set your horizontal expansion to -.175 and run that test. If the circular plate slots into the square body, then use that on this print. If it’s too tight, go lower (-.18) and try again. If the circle falls through without resistance, make that gap smaller (-.17) and try again. You want to be able to drop the circle into the square, without it falling though, but a single finger can push it though.