
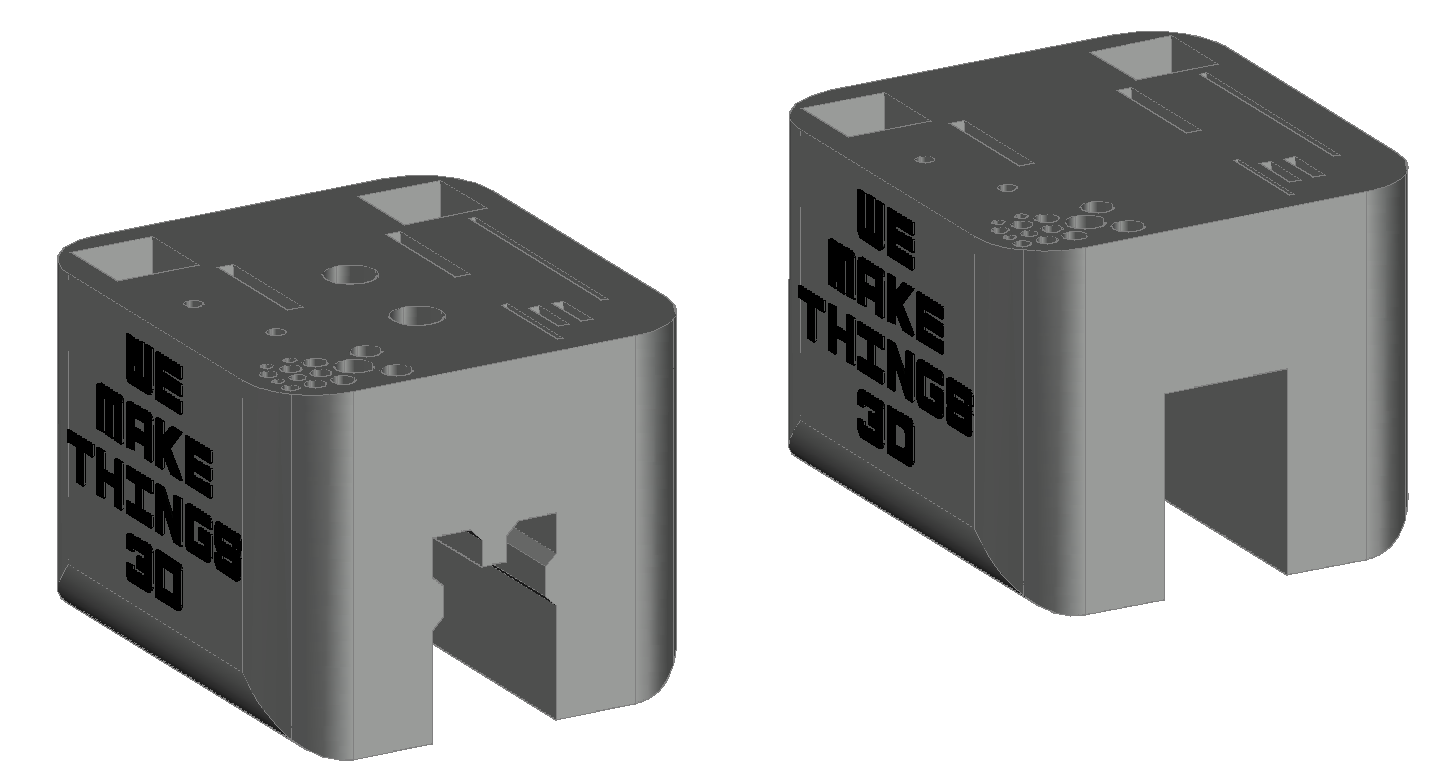
If my other organizer is too much, but you still want to keep your tools by your printer, check out this lil guy. I recycled my existing organizers when I designed the removable version and I can’t find any pictures of them, sorry =;(
Two versions, one that locks onto your printer, the other just pops on, purchase comes with both. To lock the toothed one on, you’ll need to remove the cap and 2 set screws on one side of your printer, side the organizer on the rail, and then replace the screws.
If you are worried about tolerancing, print the “Tester” first and see if it slides onto your rails. If it’s too snug, you might want set your horizontal expansion to -.1mm and try again. Also, you can print the first three layers of the organizer, stop the print, remove it, and test that all your tools fit. before you print this and only a few fit. If they are too snug for your liking, decrease horizonal expansion and try again.
I recommend printing these top side down with supports off. The overhang on the rail teeth should not droop. If you are going to use supports, make sure none are printed inside the tool holders.
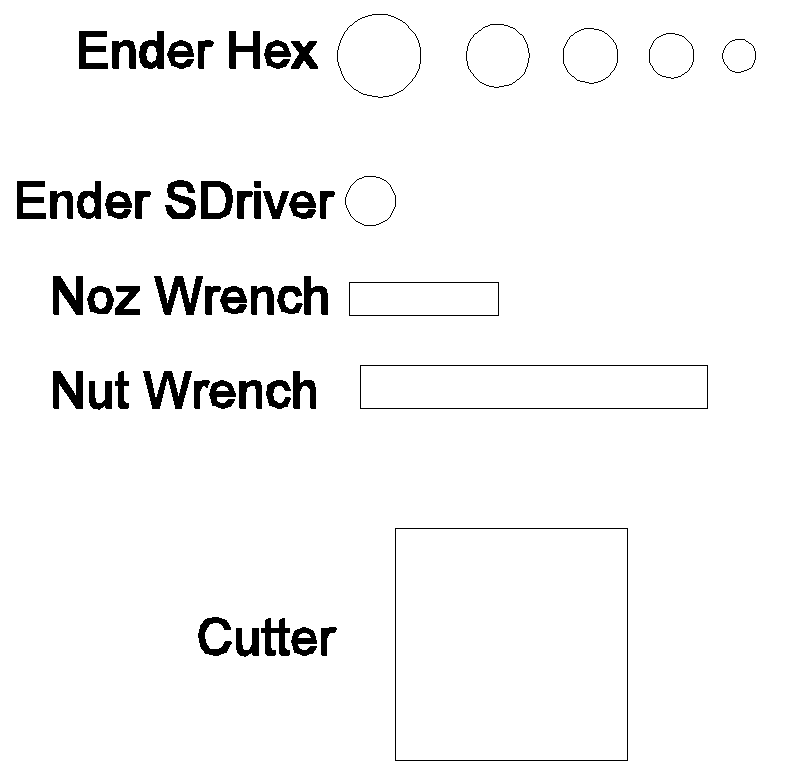